Vulnerability Assessment in AWS
We are going to explore Vulnerabiltiy Assessment in AWS. It can be perfomed with AWS Inspector.
AWS Inspector automatically scans AWS resources for vulnerabilities. AWS Inspector vulnerability assessments have several advantages:
- AWS Inspector makes regular and thorough security checks easy.
- AWS Inspector integrates seamlessly with other AWS services like EC2, S3, and RDS. This simplifies AWS security assessment.
- AWS Inspector’s simple interface makes creating assessment targets, templates, and findings easy.
- AWS Inspector organizes actionable findings by severity(high, medium, low, informational), making it easy to prioritize vulnerabilities.
- AWS Inspector lets you schedule regular assessment runs to find and fix new vulnerabilities.
- AWS Inspector streamlines AWS vulnerability assessments. It identifies security risks and prioritizes remediation, improving AWS infrastructure security.
My Plan-
- Preparing EC2 instances for assessment
- Configuring Inspector
- Scheduling an alarm
Preparing EC2 instances for assessment
First we will spin up a linux ec2 instance
Hence we go to the search box, type “EC2”. On the page, click on “Launch an instance”. Choose following config-
- Name-Linux
- Amazon Machine Image-Amazon Linux 2 AMI(HVM)
- AMI ID-ami-0dfcb1ef8550277af
- Instance type-t2.micro
- Key pair name- Choose “Create a new key pair” (or choose an existing one, for which you have the .pem key file)
- In the Network Settings, check the box for “Allow SSH traffic from” and choose “My IP”, from the drop down field.
Then Click on “Launch Instance”.
Then after the instance spins up, from your windows host machine, download AWS CLI.
Next, open command prompt and enter this command-
ssh -i "privatekeyfile.pem" Instance_Public_DNS
We will gain access to the instance and then we have to run few more commands to install the AWS agent into this instance-
wget https://inspector-agent.amazonaws.com/linux/latest/install
sudo bash install
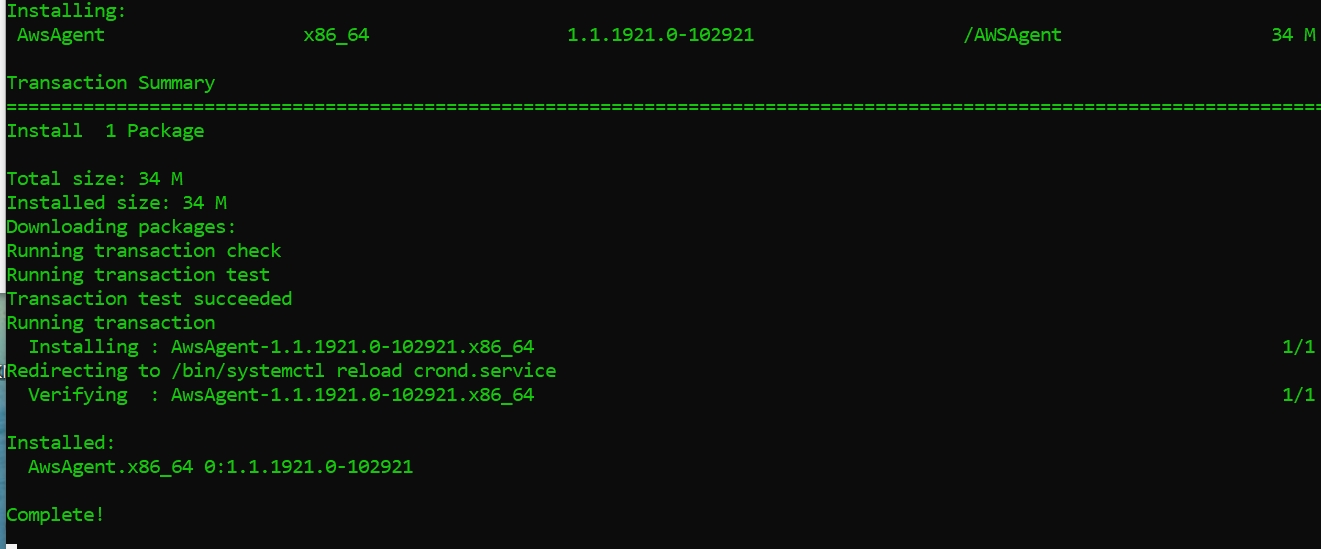
We can check if it is up and running by using -
ps -ef | grep awsagent

After we have made sure our Linux instance is ready, lets move on to our Windows EC2 instance
On the EC2 main page, click on “Launch an instance”.
Choose following config-
- Name- Windows
- AMI- Microsoft Windows Server 2022 Base
- AMI ID- ami-0c2b0d3fb02824d92
- Instance Type- t2.micro
- Key Pair- Choose an existing Key pair
- In the Network Settings, check the box for “Allow RDP traffic from” and choose “My IP”, from the drop down field.
Then Click on “Launch Instance”.
Then after the instance spins up, go to the “Connect” option on the EC2 Dashboard and choose “RDP client”.
Here we need three things to rdp into our windows instance i.e Public DNS address, Username and password.
The password isn’t readily available yet so, we will click on “Get password”, then we will upload our privatekeyfile.pem file and click on decyrpt password.
Now the password will be available.
In your windows task bar, search for “remote desktop connection”.
Paste your public dns address into the “Computer Field”
Then a connection prompt will pop up, wherein you have to enter the username and password.
When the system is up, we simply have to download the agent by opening this link in the Edge browser available-
https://inspector-agent.amazonaws.com/windows/installer/latest/AWSAgentInstall.exe
Then we simply have to run that executable file.
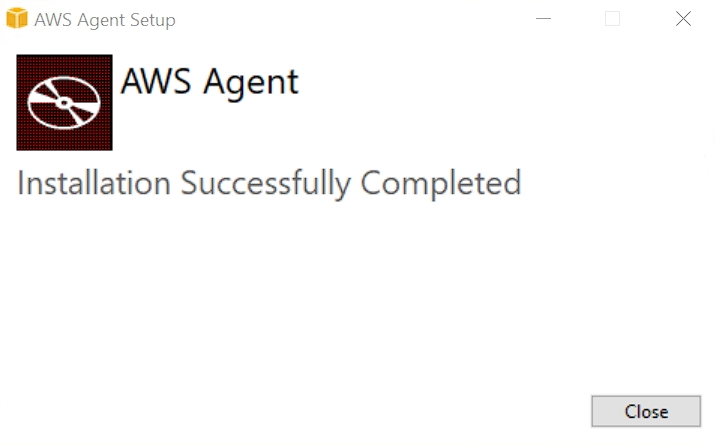
To make sure the agent is up and running, we can press win+R, and enter “services.msc”. We have to make sure AWS Agent Service and AWS Agent Updater Service are running.
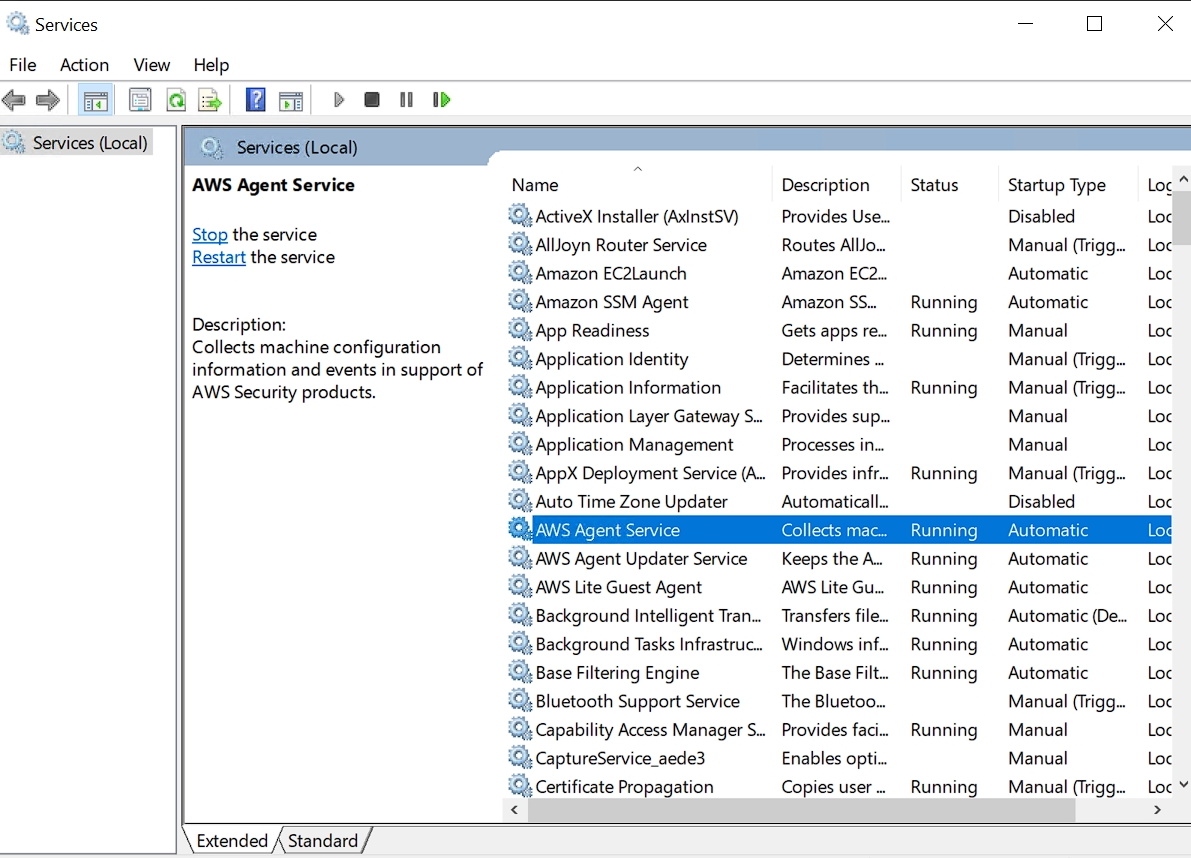
Now our instances are up and ready for us to run assessments against.
Configuring Inspector
Search for “Inspector” in AWS and click on “Amazon Inspector”
Now we may run Inspector in two ways.
One way is to use Inspector classic, which is more suitable for beginners.
The other way is to simply click on “Activate Inspector”. You may choose it as it’s a more sleaker way of doing things I will say. Within few clicks my scan was running across the whole infrastruture. And this may run up the cost as well.
In the left navigation pane, click on “Switch to Inspector classic”
Intially we will face a welcome page similar to this, in order to facilitate our assessment run.
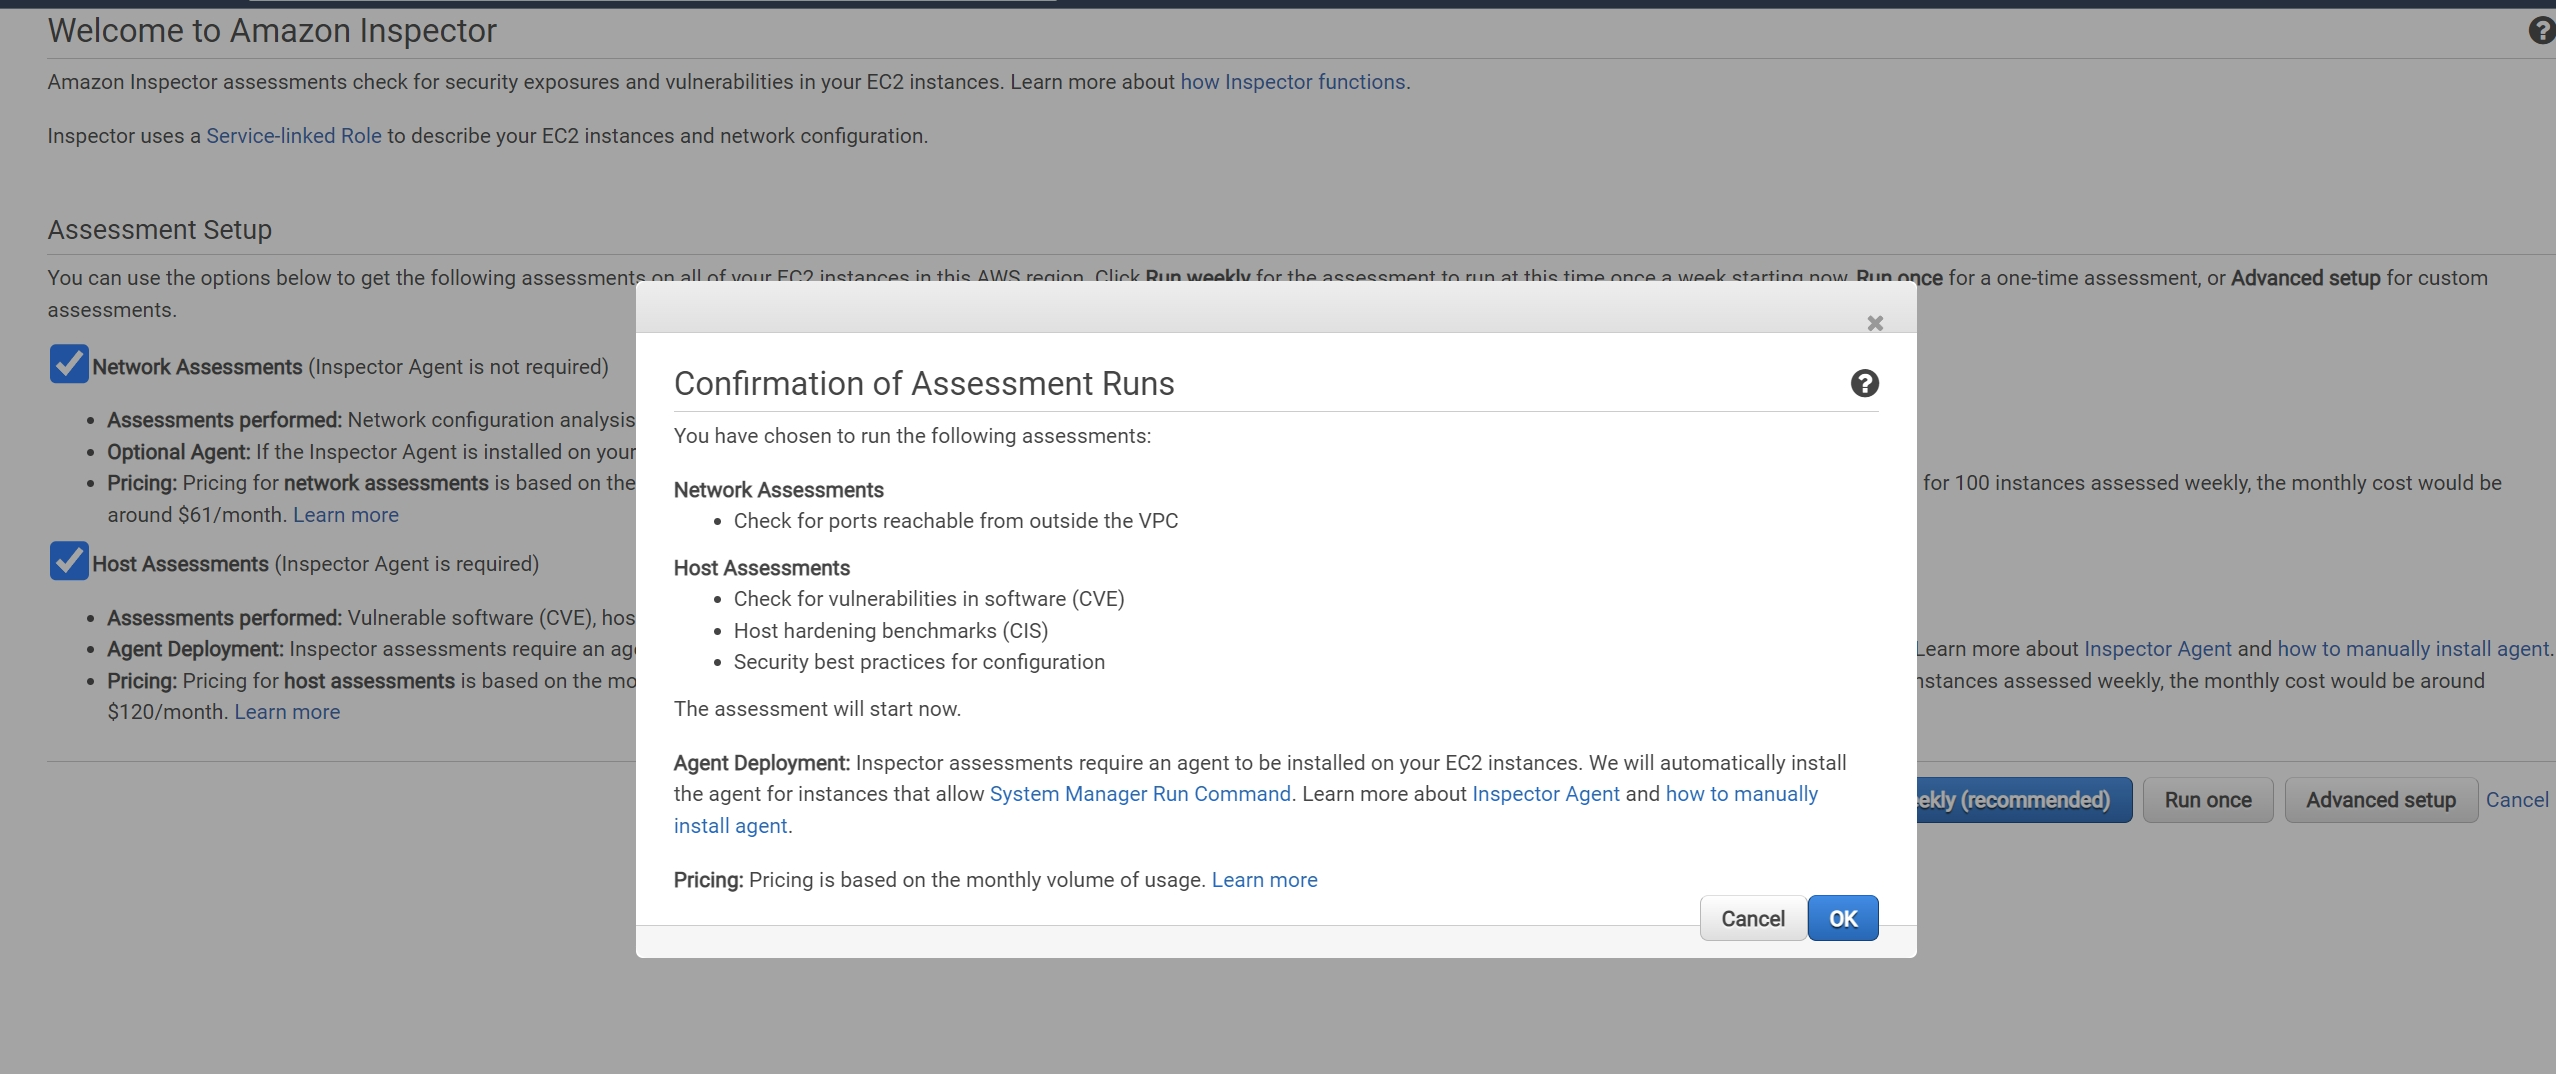
We may click on run once but you won’t have controls over the templates, which i will expand on later. I will suggest you to click on cancel.
Then, we can click on “Assessment targets”, on the left navigation pane.
Then we click on “Create”. We are going to select our resources on which we are going to run our vulnerability assessment checks on.
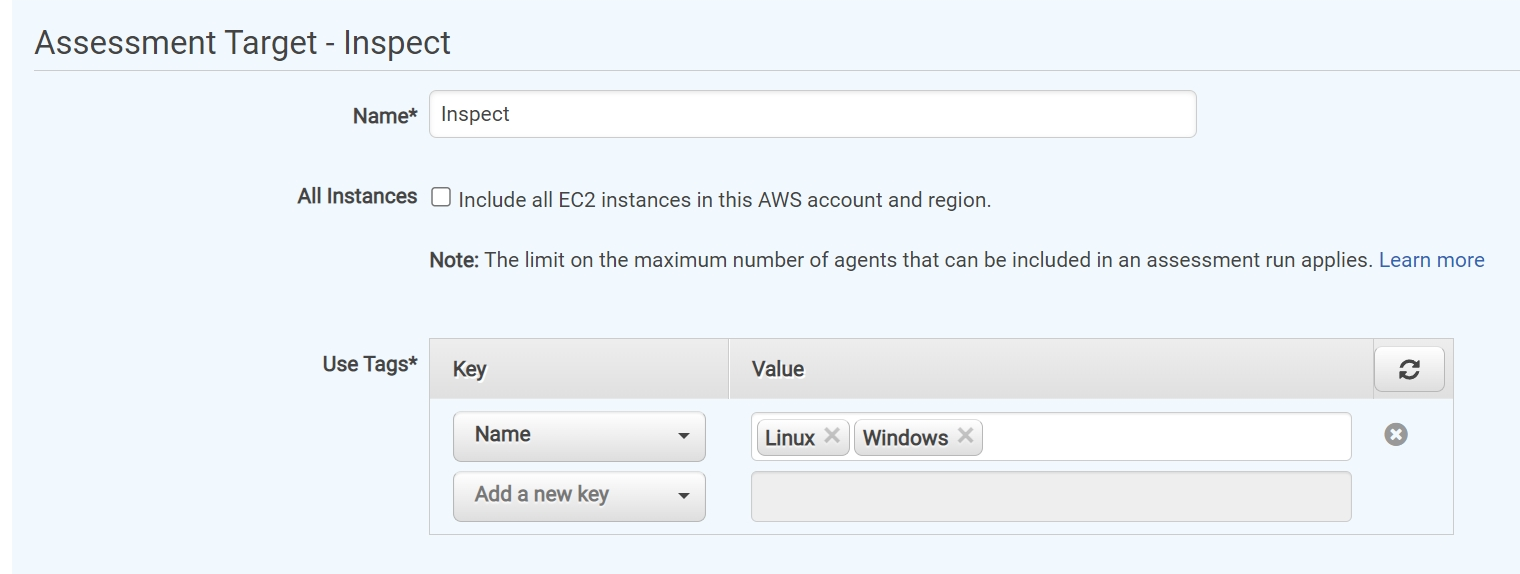
Here in the “Use Tags*” section I selected Linux and Winows from the drop down options. These were the tags for our Linux and Windows EC2 intances. We named our Assessment Target “Inspect”.
Next, we click on “Assessment templates” on the left navigation pane.
Click on “Create” and I entered the following details.
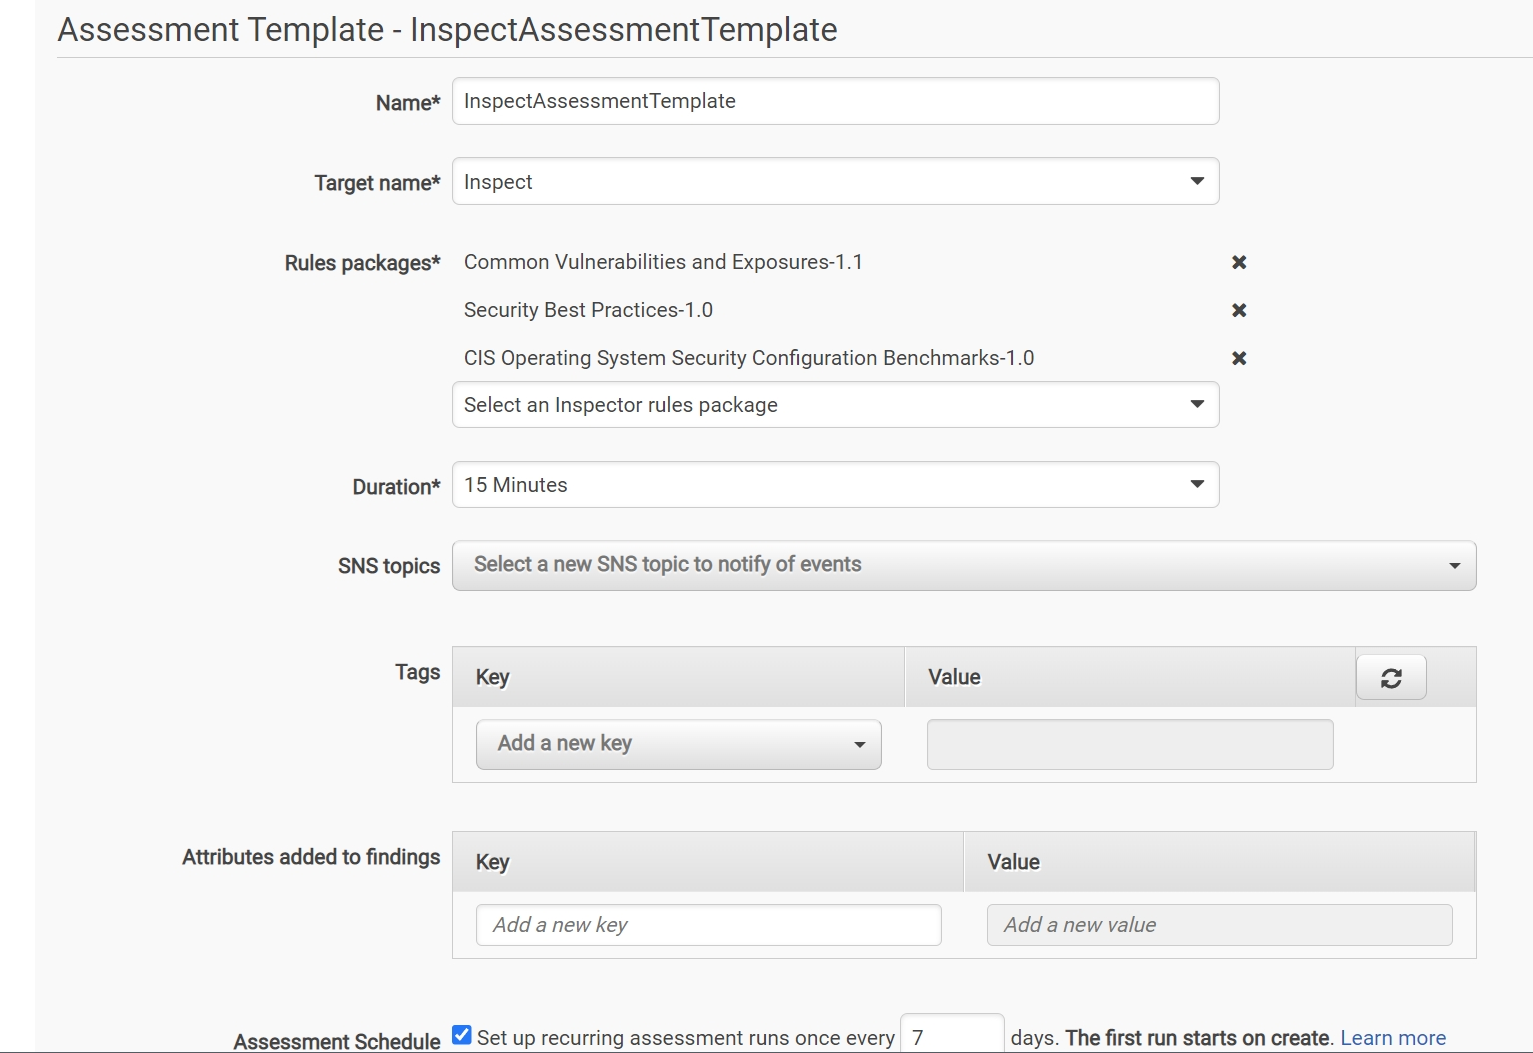
One key thing which stands out here is the Rules Packages. Here a rule is a security check that Inspector Classic does against the targets.
The checks can be done against your network configurations to find any vulnerabilities, in which case you should select “Network Reachability-1.1”.
I chose to perform host assessments for my 2 ec2 instances by selecting these 3 rule packages, namely-
- Security Best Practices-1.0,
- Common Vulnerabilities and Exposures-1.1
- CIS Operating System Security Configuration Benchmarks-1.0.
The Security Best Practices-1.0 rules package ensures systems configurations are secure. Also this package doesn’t support windows OS ec2 instance. The supported operating systems are: Amazon Linux, Amazon Linux 2, Red Hat Enterprise Linux 7, Red Hat Enterprise Linux 6, Ubuntu 14.04 LTS, Ubuntu 16.04 LTS, Ubuntu 18.04 LTS, CentOS 7, CentOS 6, Debian 9, Debian 8.
This package covers checks for various things such as-
- Disable root login over SSH
- Support SSH version 2 only
- Disable password authentication Over SSH
- Configure password maximum age
- Configure password minimum length
- Configure password complexity
- Enable ASLR
- Enable DEP
- Configure permissions for system directories
Common Vulnerabilities and Exposures-1.1- This package checks EC2 instances in your assessment targets for common vulnerabilities and exposures CVEs. Unpatched vulnerabilities can compromise service, data, and confidentiality. CVE references publicly known information security vulnerabilities and exposures. If Amazon Inspector Classic finds a CVE, you can search CVE for its ID. Search results can describe this CVE, its severity, and mitigation methods. This list includes CVEs from assessments run at the same time as the CVE rules package is updated.
CIS Operating System Security Configuration Benchmarks-1.0
CIS Security Benchmarks provides well-defined, unbiased, consensus-based industry best practices to help organizations assess and improve security. CIS Security Benchmarks Member AWS.
CIS has created benchmarks for multiple vendor product families including AWS. This package contains rules for following OS’s-
- Amazon Linux 2
- CentOS 7
- Windows 2008, 2012, 2016
- RHEL 7
- Ubuntu 14.04 16.04, 18.04
Next configuration to change is “Duration”. I chose to run the assessment for 15 minutes.
Also, we can choose to run the assessment once every 7 days or so.
After configuration is done, we can go ahead and click on “Create and run”
We can track the progress by going to “Assessment runs” in the left navigation pane.

After 15 minutes, the assessment was finished and we can export the whole report in either html or pdf format.
This is a brief result i obtained-

The whole report was 2058 pages. I have to yet to go through the whole report but there were few concerns
- There is no timeline on how regularly the CVE rules package is updated.
- There were some difficulties faced while trying to automate Inspector with AWS Lambda
Scheduling an alarm
Lastly, we can create an alarm with CloudWatch, if we have a recurring Inspector scan scheduled, in order to inform us via email if there were check failures.
Go to “Cloudwatch”, click on “Create alarms” in the new main page then again, go to “Create alarm”.
Here we have to select a metric first, search for “inspector”
we will see something like this-

I chose “Metrics by Template”

I choose the template i created “ImpactAssessmentTemplate” and selected metric- “TotalFindings”
Then i chose the following config-
- Statistic - 1 ( So we get an alarm if there is 1 new finding in a scheduled inspector scan)
- Period -5 (It should be longer for an enterprise environment)
- Threshold type- Statis
- Where TotalFindings is “Greater” than “1”
- Missing data treatment - Treat missing data as missing
- Alarm state triggger - In Alarm (when metric is outside of threshold)
- Send a notification to - select an existing email list or create one
Finally we have to name the alarm and the finalize our configuration and click “Create alarm”
Reference-